Skip to end of metadata
Go to start of metadata

You are viewing an old version of this page. View the current version.

Compare with Current View Page History

« Previous Version 20 Next »

This is where all aspects of a Customer's catalogue can be configured.


Create / Edit a Folder

 Click here to expand...

To create a new folder, click the New Folder button.

To edit an existing folder, click the Edit icon on the folder.

The Details form displays:
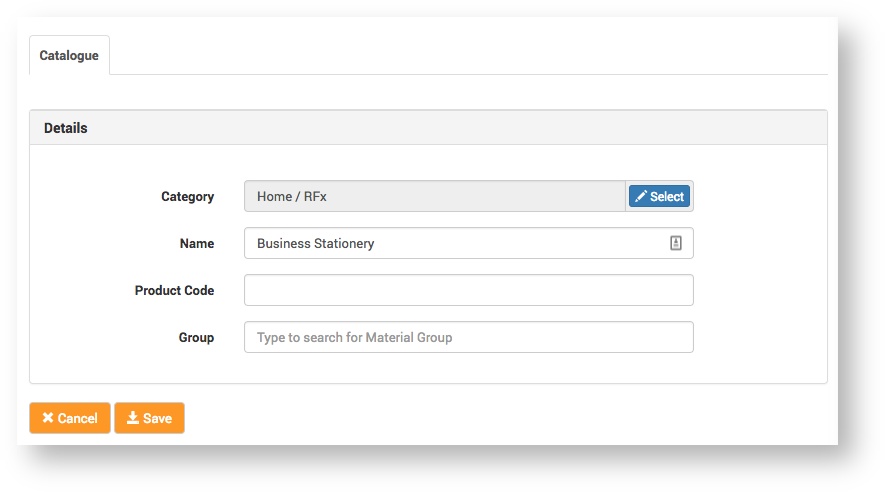
Complete the form fields:

FieldDescription
Category

Select the category you want the folder to fall under.


 Instructions
  1. Click the Select button.

  2. In the Folders box, select the folder category.
    A tick will appear in the selected category, e.g.


  3. Click the Move to Folder button.

  4. Click the Save button.

Name

Enter the name you want the folder to have, e.g.

Product CodeEnter a product code, if required. 
This is for internal tracking purposes only. It does not display on the folder in the Customer Catalogue.

Click the Save button.
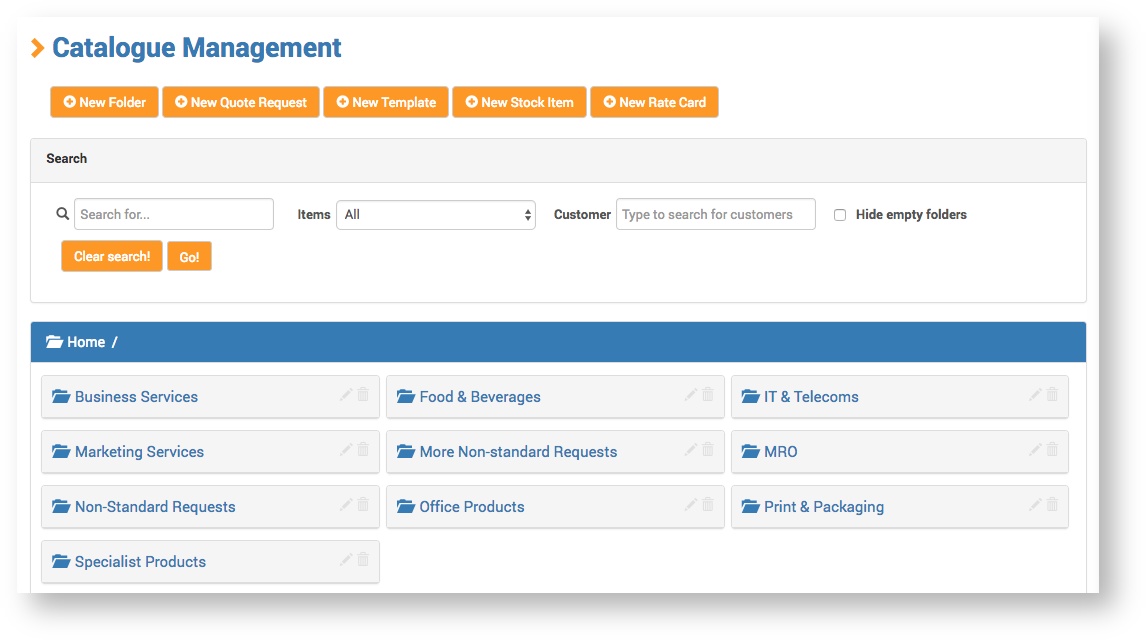
The new folder displays with the other folders on the Catalogue Management page.


Create / Edit a Quote Request

 Click here to expand...

To create a new Quote Request, click the New Quote Request button.

To edit an existing Quote Request, click the Edit icon on the Quote Request

The New / Edit <Quote Request type> page displays.

Catalogue

 Click here to expand...

Configuration

 Click here to expand...
FieldDescription
WorkflowSelect the Project workflow that the Quote Request should follow.
For more information about workflows see Creating / Editing a Workflow
Form

Select the product specification Form for the Quote Request type. 
This is the specification form that the Service Provider Administrator will complete when raising a Quote Request for a Customer.

Details

 Click here to expand...
FieldDescription
Image

Click Choose file and select a product image to upload.
This image will display on the Quote Request product 'card' in the Customer Catalogue.

 Example Quote Request Product Image

Category

Select the category you want the folder to fall under.


 Instructions
  1. Click the Select button.

  2. In the Folders box, select the folder category.
    A tick will appear in the selected category, e.g.


  3. Click the Move to Folder button.

  4. Click the Save button.
NameEnter the name you want the Quote Request product to have. 
For example 'Gatefold Folder (Single Pocket) in the image example above.
Product CodeEnter a product code, if required. 
If entered, the code will display in front of the Quote Request Product name. For example, in front of 'Gatefold Folder (Single Pocket) in the image example above.

Publishing

 Click here to expand...
FieldDescription
DisplaySet the time period that you want the Quote Request product to be available in the Customer Catalogue.
This can be left unset if you don't want to set a time limit.
Not orderableSelect this option if you don't want Customers to be able to order the Quote Request product.
This is useful, for example, while the Quote Request type is in the process of being configured.
Publish to

Here you can set the Customers / Customer Users you want to be able to access the Quote Request type in the Customer Catalogue.
If no Customers are added, the Quote Request type will be published (be available to order) to all Customers.


 How to add Customers / Customer Users
  1. Start typing the Customer name in the input field, and select the Customer from the list that displays.


  2. Click the Add button.
    Groups and Users input fields appear.

  3. Add Customer Groups and / or Customers as required, in the same way.


Just selecting a Customer will publish the Quote Request type to all Customer Users in the Customer organisation. Adding Customer Groups and Users will restrict publication to only those Groups and Users.


Supplier Services

I don’t understand how this works. Is it just selecting Suppliers who will be available to select at the ‘selecting suppliers and services’ workflow stage of a Quote Request project?
Not clear to me what the notes / radio button notes mean.


Create / Edit a Rate Card

 Click here to expand...

To create a new Rate Card, click the New Rate Card button.

To edit an existing Rate Card, click the Edit icon on the Rate Card.

The New / Edit <Rate Card type> page displays.

New Rate Card

Configuration

 Click here to expand...
FieldDescription
WorkflowSelect the Project workflow that the Rate Card should follow.
For more information about workflows see Creating / Editing a Workflow
Form

Select the product specification Form for the Rate Card type. 
This is the specification form that the Service Provider Administrator will complete when ordering a Rate Card for a Customer.


Details

 Click here to expand...
FieldDescription
Image

Click Choose file and select a product image to upload.
This image will display on the Rate Card product 'card' in the Customer Catalogue.

 Example Rate Card Product Image

Category

Select the category you want the folder to fall under.


 Instructions
  1. Click the Select button.

  2. In the Folders box, select the folder category.
    A tick will appear in the selected category, e.g.


  3. Click the Move to Folder button.

  4. Click the Save button.
NameEnter the name you want the Rate Card product to have. 
For example 'Standard Folder (Single Pocket) in the image example above.
Product CodeEnter a product code, if required. 
If entered, the code will display in front of the Rate Card product name. For example, in front of 'Standard Folder (Single Pocket) in the image example above.


Publishing

 Click here to expand...
FieldDescription
DisplaySet the time period that you want the Rate Card product to be available in the Customer Catalogue.
This can be left unset if you don't want to set a time limit.
Not orderableSelect this option if you don't want Customers to be able to order the Rate Card product.
This is useful, for example, while the Rate Card type is in the process of being configured.
Publish to

Here you can set the Customers / Customer Users you want to be able to access the Rate Card type in the Customer Catalogue.
If no Customers are added, the Quote Request type will be published (be available to order) to all Customers.


 How to add Customers / Customer Users
  1. Start typing the Customer name in the input field, and select the Customer from the list that displays.


  2. Click the Add button.
    Groups and Users input fields appear.

  3. Add Customer Groups and / or Customers as required, in the same way.


Just selecting a Customer will publish the Rate Card type to all Customer Users in the Customer organisation. Adding Customer Groups and Users will restrict publication to only those Groups and Users.


  • No labels