The Service Provider can create new Suppliers and update existing ones on the Claritum system. The Suppliers will then be available for selection in Project workflows.
This is where all Supplier system details and functions can be configured.
...
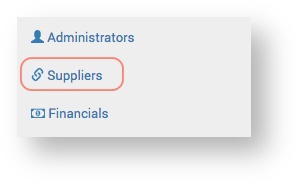
From the main menu select Suppliers.
| Expand |
|---|
| title | The Suppliers page displays |
|---|
|

|
Click the New Supplier button.
...
Details
| Expand |
|---|
On the Details page, complete the required fields and click Save. 
| Note |
|---|
| The only mandatory field is Name. The other fields are to be completed at the discretion of the Service Provider. Some fields will be useful to one Service Provider, but not another. Fields can be easily edited after a Customer is created. For more information about Invoicing Tolerance see What is 'Invoicing Tolerance'? |
|
...
| Expand |
|---|
This is where you can specify which Customers the Supplier can deliver to. Customers added here will be selectable at the 'Select Suppliers' stage of the Project workflow. For more information see Selecting Suppliers. 
Customers can be added and removed.
| Option | Description |
|---|
| All customers | All Customers on the system are displayed and can be linked to the Supplier (by clicking Save). | | No customers | No Customers are displayed and none can be linked to the Supplier (by clicking Save).
Tip > This might be needed if a Supplier has been set up on the system, but not 'gone live' yet. | | Selected customers | Selected Customers are displayed and linked to the Suppliers (by clicking Save).
Use the Add functionality to add Customers to the Supplier.
Use the delete functionality -  - to remove Customers from the Supplier. - to remove Customers from the Supplier. |
Add a Customer- Start typing the Customer name in the input field. When the name appears, select it.
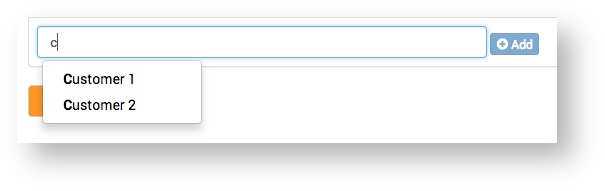 - Click the Add button.
- Click the Save button.
Delete a Customer- Click the delete icon next to the Customer.
- Click the Save button.
|
...
| Expand |
|---|
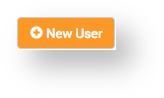
This is where Supplier Users can be added, edited and deleted. - Click the New User button.
Details| Expand |
|---|
This is where a Supplier User's details are set. On the Details page, complete the required fields and click Save.  Image Modified Image Modified
| Note |
|---|
The only mandatory field is Email, but we recommend you complete as many fields as possible, particularly Name and Password. |
|
Permissions| Expand |
|---|
This is where you can configure the various Supplier User functions (what the Supplier User can and can't do in the system).  Image Modified Image Modified
For information about extras see Project Extras. |
Customers| Expand |
|---|
This is where you can specify which Customers the Supplier User can deal with / see orders from. | Note |
|---|
A Supplier can be assigned multiple Customers in the system, but it might not be best for a Supplier User to have visibility of and access to all Customers. As such, this functionality allows the Service Provider to assign only certain Customers to a Supplier User. |
Customers can be searched for, added and removed. 
Add a Customer- Start typing the Customer name in the input field. When the name appears, select it.
- Click the Add button.
- Click the Save button.
Delete a Customer- Click the delete icon next to the Customer.
- Click the Save button.
|
|
...
| Expand |
|---|
This is where a Service Provider can enter any information about the Supplier that isn't covered on the other Supplier pages (Details, Services, Performance etc). Examples of notes that could be entered here include, information about the Supplier contract, about their performance, or about the Service Provider-Supplier relationship. Notes could also include links to important information about the Supplier, relevant documentation etc. Type your notes in the text box and click the Save button. 
|
...